Creating your own preset in Adobe Lightroom is a game-changer. It lets you save your favorite edits and apply them instantly to other photos. Whether you’re a portrait photographer or a landscape shooter, custom presets can dramatically speed up your workflow and ensure a consistent style across your work.
In this guide, you’ll learn how to create, customize, and manage presets in Lightroom. You’ll also get pro tips for organizing your preset library and troubleshooting common issues.
Step-by-Step Guide to Creating a Lightroom Preset
1. Open Lightroom and Import a Photo
- Launch Adobe Lightroom Classic or Lightroom (cloud-based).
- Click File > Import Photos and Video to bring in an image to edit.
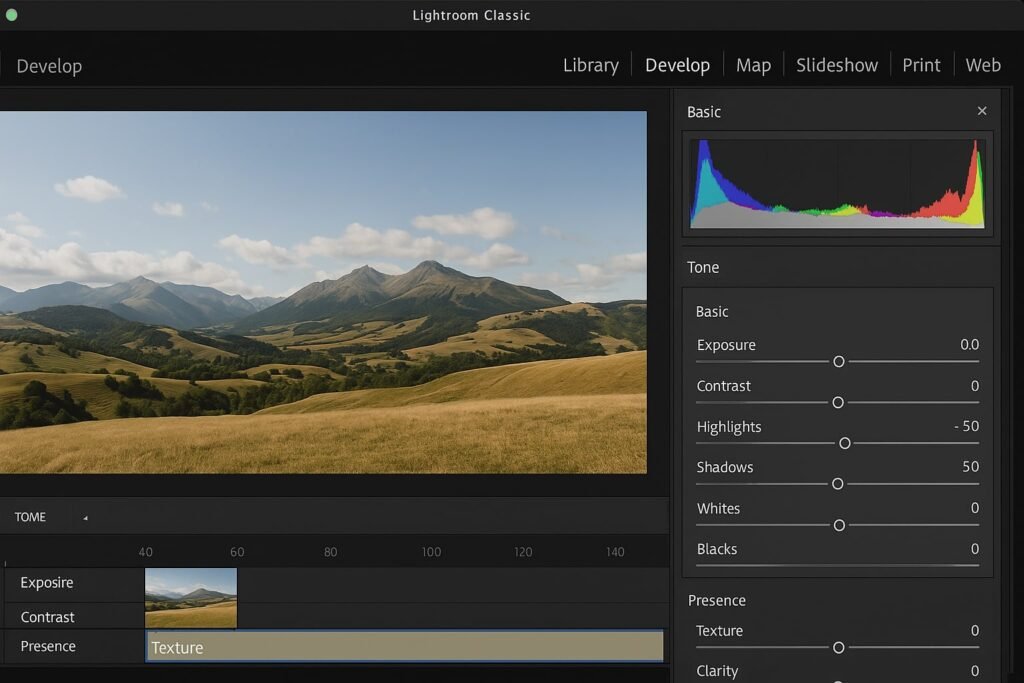
2. Edit the Photo with Your Desired Settings
- Use the Develop module (Classic) or Edit panel (cloud-based).
- Adjust exposure, contrast, color grading, sharpening, etc.
3. Open the Presets Panel
- In Lightroom Classic: Find the Presets panel on the left side of the Develop module.
- In Lightroom (cloud): Click the Presets icon (three sliders) on the right.
4. Click the “+” Icon to Create a New Preset
- Select Create Preset from the dropdown.
5. Name Your Preset
- Use a descriptive name (e.g., “Warm Sunset Portrait”).
- Choose or create a preset group to organize your presets.
6. Select Settings to Include
- Lightroom shows a list of all the adjustments you’ve made.
- Check only what you want included (e.g., color, tone, effects).
- Tip: Leave White Balance unchecked if you want it to adjust per photo.
7. Click Create
- Your preset will appear in the selected preset group.
8. Apply the Preset to Other Photos
- In the Library or Develop module, select another photo.
- Click your preset in the Presets panel to apply it.
9. Sync Presets Across Devices (Lightroom cloud users)
- Presets sync automatically across devices if you’re logged into your Adobe account.
Pro Tips & Workflow Improvements
- Use Folders to Organize: Keep your presets tidy by grouping them by type or shoot style.
- Test on Various Images: Apply your preset to multiple photos to ensure it works universally.
- Create Variations: Make tweaks and save them as versions (e.g., Bright, Matte, Contrast Boost).
- Back Up Your Presets: Export them by right-clicking and selecting Export.
- Use Descriptive Names: Include camera type or scene type in the name for quick recall.
Advanced Use Case: Batch Editing with Presets
- Select multiple photos in the Library module.
- Click Quick Develop on the right panel.
- Choose your preset from the Saved Preset dropdown.
- All selected photos will update instantly with the preset.
Troubleshooting & Common Mistakes
- Preset not appearing?
- Ensure it’s saved in the right preset group.
- Restart Lightroom if it’s not refreshing.
- Preset looks wrong on some photos?
- May need to uncheck settings like Exposure or White Balance during preset creation.
- Changes not applying?
- Make sure you’re in the Develop module (Classic) or have the correct photo selected.
- Presets missing after update?
- Check if Lightroom moved them to a new location (especially after major updates).
Conclusion
Now you know how to create your own Lightroom preset and use it to speed up your editing. It’s one of the simplest ways to save time and stay consistent. Try making a few variations and test them on different types of images.