Want your footage to feel like a Hollywood film? Whether you’re editing travel vlogs, music videos, documentaries, or narrative shorts, achieving a “cinematic look” is completely within reach using Adobe Premiere Pro.
What makes a video look cinematic? It’s not just about expensive cameras or lenses. It’s about how you present your footage—through color, framing, motion, and audio. With a few carefully chosen adjustments in Premiere Pro, you can dramatically elevate the emotional and visual impact of your edits.
In this in-depth guide, you’ll learn four essential steps to create cinematic-looking content. These steps are quick to implement, but they have a powerful effect. By the end, you’ll know how to craft videos that look polished, professional, and purposefully designed.
Learn to do anything in Premiere Pro with our tutorials
Step 1: Add Cinematic Black Bars (2.35:1 Aspect Ratio)
The first thing most viewers associate with cinema is the ultra-wide screen format. Classic movies and modern blockbusters alike often use a 2.35:1 or 2.39:1 aspect ratio. You can replicate this look easily in Premiere Pro:
How to Do It:
- Go to the Effects panel and search for “Crop.”
- Drag the Crop effect onto the clip or an adjustment layer above your footage.
- In the Effect Controls panel, set the Top and Bottom crop values to around 12% each. This simulates a 2.35:1 aspect ratio.
- Make sure to keep the center of action inside the cropped frame.
Why It Works:
This adds immediate visual weight and a cinematic feel by constraining the viewer’s focus, much like a theater screen does. It subtly alters the perceived composition and gives a more dramatic and intentional frame.
Pro Tip:
Instead of manually cropping each clip, create a reusable PNG file with black bars and place it on the top track. Or use an adjustment layer with the crop effect so you can apply the look uniformly across your entire sequence.

Step 2: Apply a Cinematic Color Grade
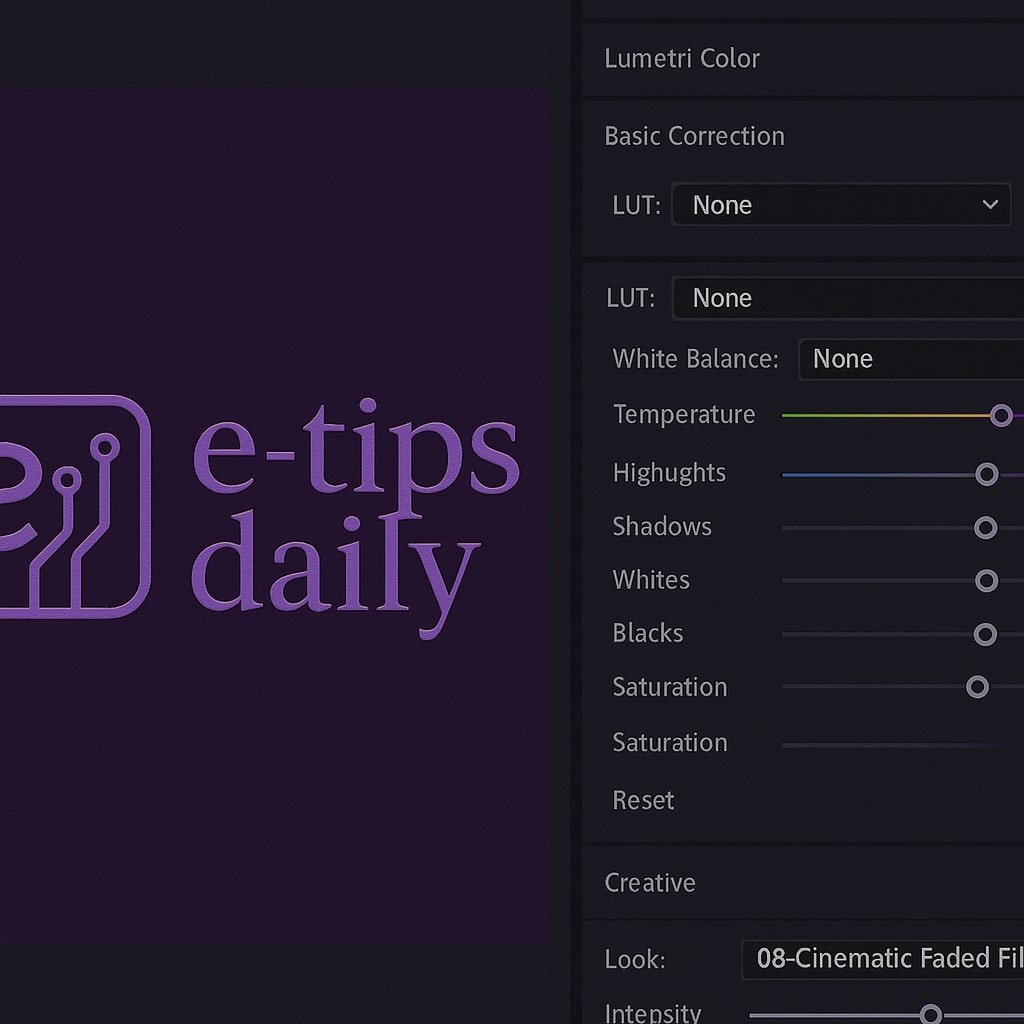
Color grading is where the magic happens. A good cinematic look typically includes increased contrast, lowered saturation, and a warm or teal/orange color cast. Premiere Pro’s Lumetri Color tool makes this straightforward.
Basic Color Grade:
- Open the Color workspace (Window > Workspaces > Color).
- Select your clip and go to the Lumetri Color panel.
- Under Basic Correction:
- Increase Contrast slightly (10–30 depending on your footage).
- Lower Highlights to preserve sky or bright areas.
- Raise Shadows just enough to retain detail.
- Adjust Saturation slightly down (90–95) for a filmic tone.
Add a LUT (Look-Up Table):
- Go to the Creative tab.
- Use the Look dropdown to select a built-in LUT or import your own.
- Adjust Intensity to dial in the look (20–60 is a good range).
Optional Adjustments:
- In the Curves tab, use RGB curves to fine-tune contrast.
- Add subtle Faded Film and Sharpening in the Creative tab.
Best Free LUTs for Cinematic Looks:
- Juan Melara Print Film Emulations
- IWLTBAP LUTs
- Cine LUTs by RocketStock
Step 3: Use Proper Frame Rate & Add Motion Blur
One of the most overlooked aspects of cinematic video is frame rate. Most films are shot and played back at 24 fps (frames per second). This frame rate creates natural motion blur, which feels more immersive and film-like than the ultra-smooth 60 fps.
How to Set Frame Rate:
- Go to Sequence > Sequence Settings.
- Set the Timebase to 23.976 fps (the standard film rate).
- Make sure your clips match the timeline frame rate. If they don’t, right-click on the clip in the Project panel > Modify > Interpret Footage, and set it to 23.976 fps.
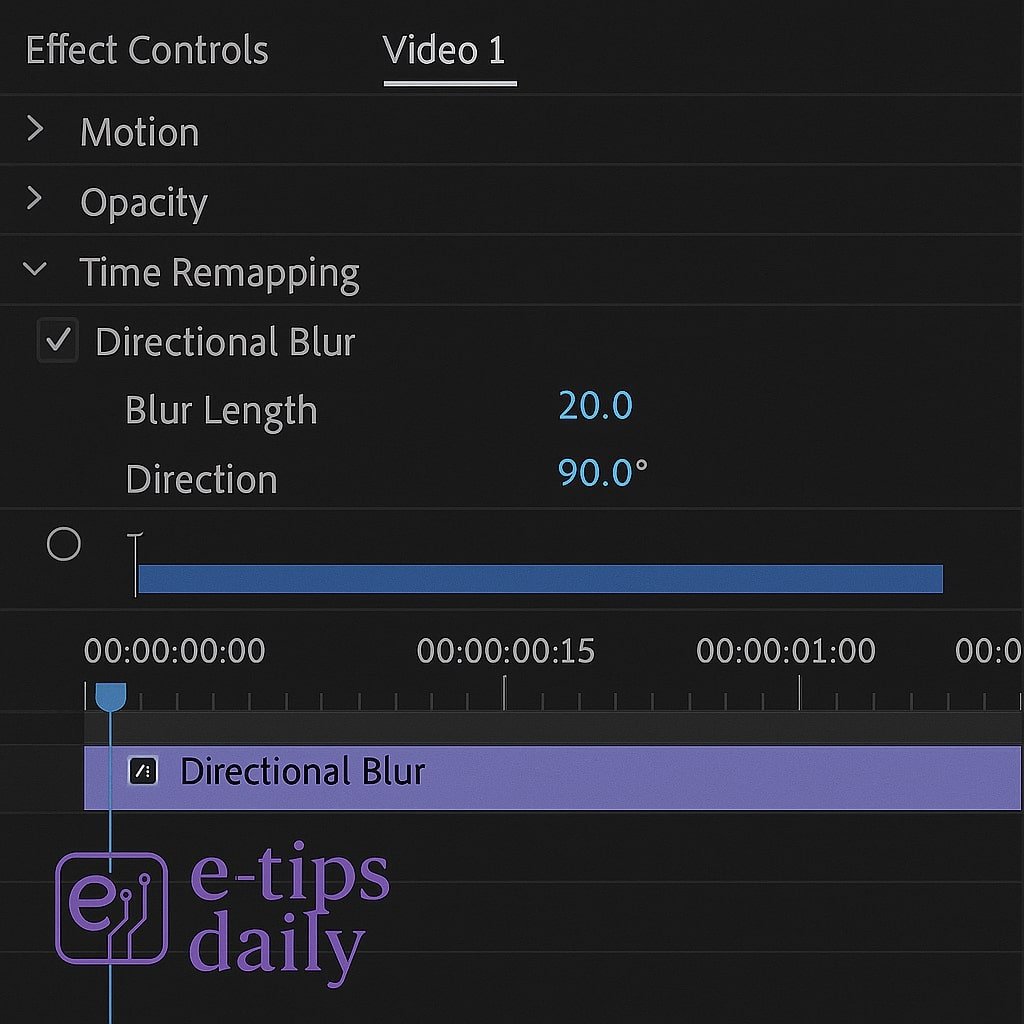
Add Motion Blur (Simulated):
Premiere Pro doesn’t natively offer motion blur, but you can simulate it:
- Search for “Directional Blur” in the Effects panel.
- Apply it to an adjustment layer or fast-moving clip.
- Set Direction to match the motion (typically 0 or 90 degrees).
- Increase Blur Length (10–30 depending on speed).
Why This Works:
The blur softens fast movements, mimicking the natural optical blur you’d get from a physical camera and shutter speed. This is essential for action scenes, handheld footage, or panning shots.
Step 4: Add Depth with Vignettes and Sound Design
The final polish often comes from the small touches—subtle enhancements that create depth and emotional impact.
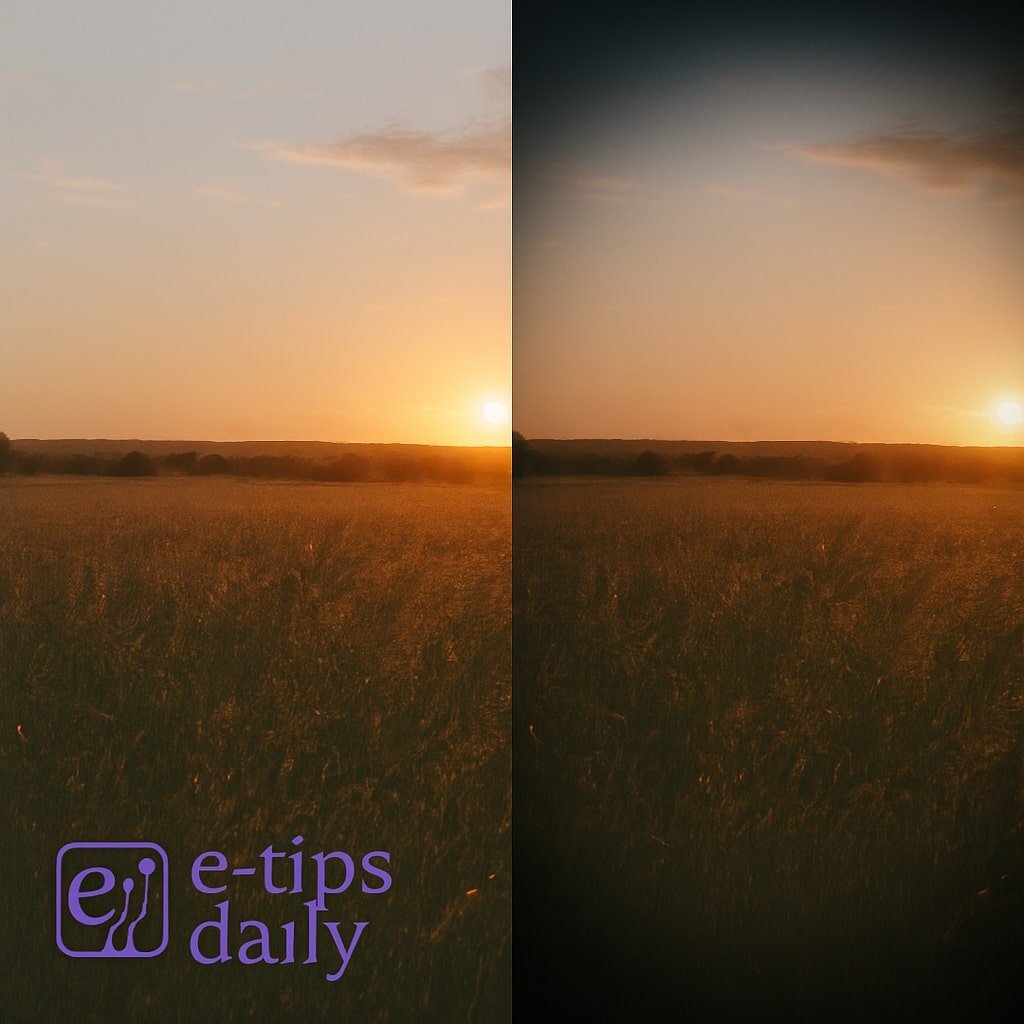
Add a Vignette:
- Open the Lumetri Color panel.
- Scroll down to the Vignette section.
- Set Amount between -1.0 to -2.0.
- Adjust Midpoint, Feather, and Roundness to taste.
This softens the edges and subtly guides the viewer’s eye to the center.
Add Ambient Audio & Music:
- Layer ambient sounds like birds chirping, wind blowing, or city noise.
- Add a music bed that complements the mood. Use keyframes to lower music under dialogue.
- Subtle reverb or stereo widening on background sounds can enhance immersion.
Why Audio Matters:
Film is 50% sound. A cinematic look without appropriate audio feels empty. Ambient audio gives your scenes a sense of place and emotional tone.
Pro Tips & Workflow Enhancements
- Use Adjustment Layers: Apply LUTs, effects, or crops to a single layer instead of individual clips.
- Use Gaussian Blur on Corners: Add a soft focus on the edges using an elliptical mask and blur. This helps draw attention to your subject.
- Use Anamorphic Lens Flares and Grain Overlays: Plugins like Red Giant Universe or stock overlays can add believable flares and texture.
- Speed Ramp Like a Pro: Right-click clip > Show Clip Keyframes > Time Remapping. Add keyframes to gradually speed up or slow down footage.
- Auto Reframe for Social Cuts: Use Premiere’s Auto Reframe to maintain cinematic composition in vertical or square formats.
Troubleshooting & Common Mistakes
Problem: My colors look flat after export
- Fix: Ensure you’ve enabled “Render at Maximum Depth” and “Use Maximum Render Quality” in export settings. Double-check your LUT intensity and playback monitor calibration.
Problem: Black bars hide important visuals
- Fix: Reframe clips by adjusting the vertical position in the Effect Controls > Motion settings.
Problem: Premiere is lagging with color effects
- Fix: Render previews with the Enter key. Lower playback resolution to 1/2 or 1/4. Consider using proxies for high-res footage.
Problem: My vignette is too obvious
- Fix: Use feathering generously. A vignette should be felt, not seen.
Problem: Motion blur looks fake
- Fix: Only apply it to clips with actual fast movement. Use sparingly and tweak direction and length to match natural motion.
Conclusion
Cinematic footage isn’t just for big-budget productions. With a few deliberate steps—letterboxing, color grading, motion tuning, and depth cues—you can make any video project feel like it belongs on the big screen. These four core techniques in Premiere Pro are the foundation of visual storytelling.
Experiment, fine-tune, and trust your eye. As you get comfortable with these tools, you’ll start to develop your own signature style.
How to Convert 60fps Footage into Smooth Slow Motion in Adobe Premiere Pro
Want buttery-smooth slow motion for your videos? If you shot at 60 frames per second (fps), you’re in luck. That higher frame rate gives you the flexibility to slow down your footage without introducing choppy playback or motion stutter. In this guide, you’ll learn exactly how to convert 60fps clips into stunning slow motion inside […]
5 Color Grading Tricks You Need to Know in Premiere Pro
Color grading in Premiere Pro can make or break the look of your video. Whether you’re crafting cinematic scenes or just giving your footage a polished touch, mastering color grading tools unlocks the full visual potential of your project. In…

How to Convert Stock Footage to LOG in Premiere Pro: A Full Tutorial
Why Flatten Stock Footage Before Applying a LUT? Stock footage often comes in pre-graded Rec.709 format — baked-in contrast, heavy saturation, and strong tonal shifts. That’s a nightmare for color consistency if you’re applying the same LUT across multiple clips…
How to Use the Essential Graphics Panel in Premiere Pro (Complete Guide)
The Essential Graphics panel in Adobe Premiere Pro is your gateway to professional-looking titles, lower thirds, captions, and custom graphics—all without leaving the editing timeline. Whether you’re creating YouTube content, documentaries, or commercial projects, mastering this panel will elevate your videos with…

How to Create the F1 Movie Cinematic LUT in Premiere Pro
There’s something special about the way the F1 movie looks, right? If you’ve seen it, you know what I’m talking about. The visuals don’t just support the story—they are the story. From the glint of sunlight across carbon fiber to the cinematic haze rising…
With just a few hours of setup and consistent posting, Faceless.video can become a powerful income stream. Focus on high-value content, optimize for engagement and monetization, and stay consistent. Over time, your channel can turn from a side hustle into a full-time business.
✅ Next Step: Sign up and create your first 3 videos this week
2 Comments
How to Create a Cinematic F1 Movie LUT in Premiere Pro
July 10, 2025[…] reverse-engineer a cinematic LUT, we need to understand what the filmmakers were going for. The F1 movie (directed by Joseph […]
Convert Footage to LOG in Premiere - E-Tips Daily
July 10, 2025[…] 🎥 Want to give your footage a cinematic look after this step? Check out our guide on how to make anything look cinematic in Premiere Pro in just 4 steps. […]