Creating smooth transitions in Premiere Pro is one of the best ways to elevate the quality of your videos. Whether you’re cutting between scenes, moving from one clip to another, or highlighting a specific moment, a well-designed transition can make your video feel polished and professional.
In this guide, you’ll learn exactly how to create seamless, cinematic transitions using native tools in Adobe Premiere Pro. By the end, you’ll not only know how to apply transitions, but also how to customize and fine-tune them for maximum impact.
Step-by-Step Guide: Creating Smooth Transitions
- Import Your Clips into Premiere Pro: Open Premiere Pro and create a new project. Import your media by going to File > Import or dragging your clips into the Project panel.
- Place Clips on the Timeline: Drag your clips from the Project panel to the Timeline, placing them on Video Track 1. Ensure there is no gap between the clips where you want the transition.
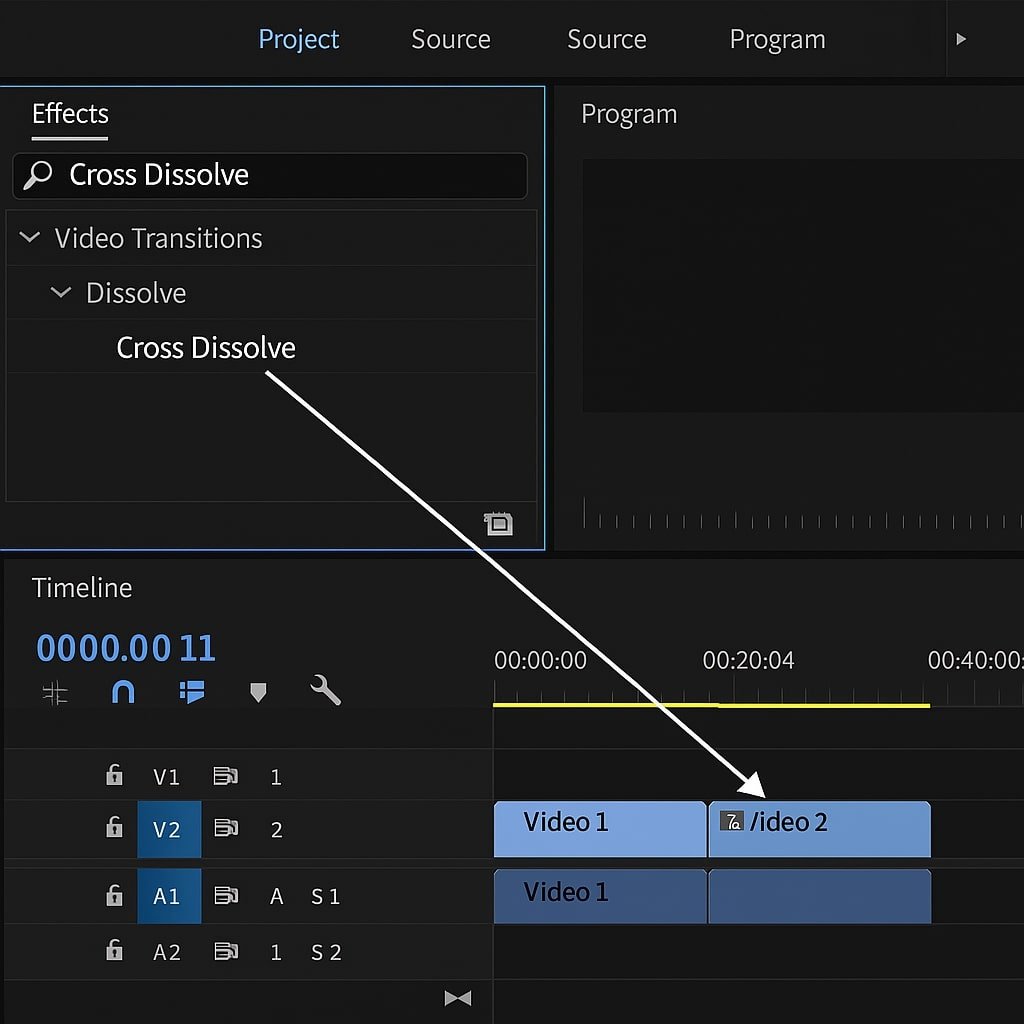
- Apply a Default Transition (Cross Dissolve): Go to the Effects panel, search for Cross Dissolve under Video Transitions > Dissolve. Drag it between two clips on the timeline.

- Adjust Transition Duration: Click the transition in the timeline and adjust its length by dragging the edges. Or, right-click and choose Set Transition Duration to enter a specific time.
- Use Alignment Options: Right-click the transition and choose Set Transition Alignment to decide if it should be Start at Cut, Center at Cut, or End at Cut. This affects how the transition behaves relative to your clips.
- Fine-Tune with Opacity and Keyframes: For more control, use Effect Controls > Opacity and keyframe the Opacity values to create custom fades.
- Try More Dynamic Transitions (e.g., Zoom or Slide): In the Effects panel, explore transitions under Slide, Zoom, or use Transform effects to create custom motion.
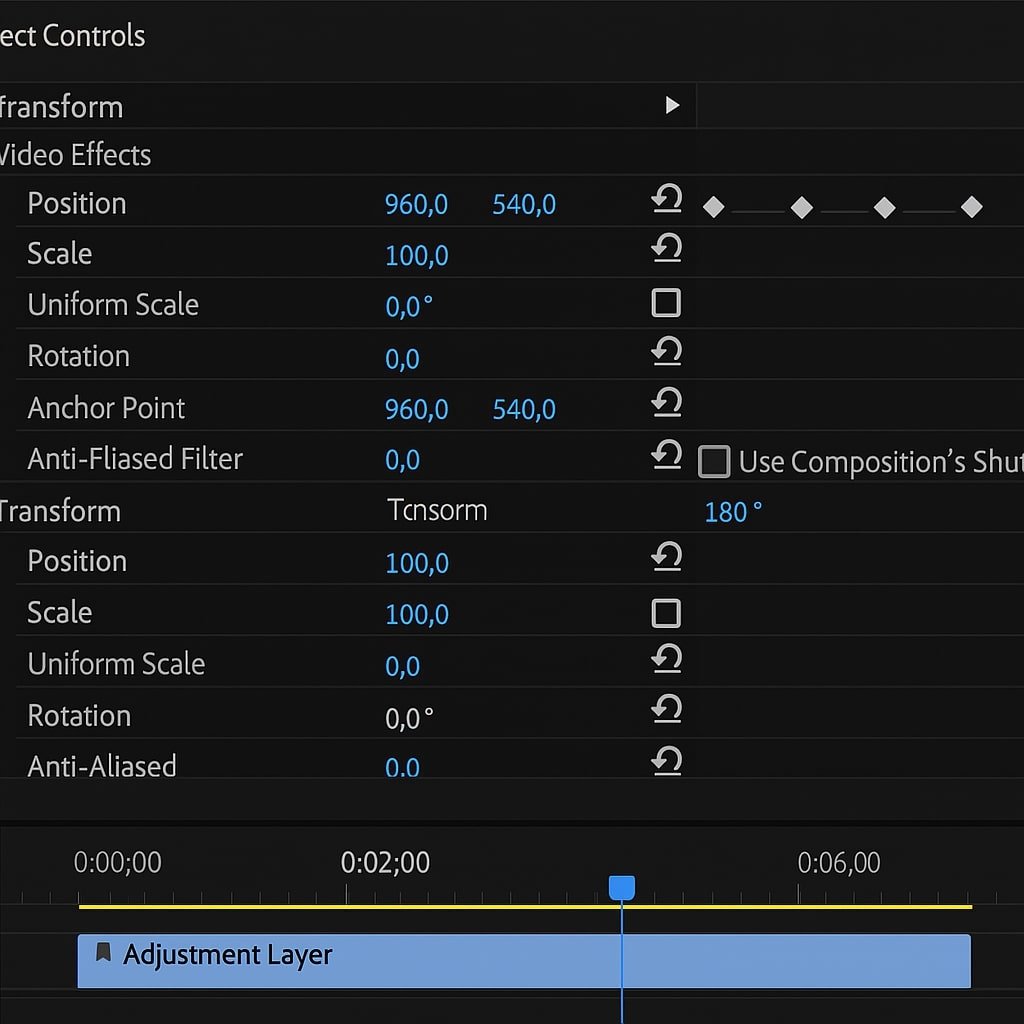
- Use Adjustment Layers for Smooth Motion: Go to File > New > Adjustment Layer, drag it above your clips on the timeline, and apply motion effects like Transform to create seamless zooms or camera moves.
- Enable Motion Blur (using Transform Effect): Add the Transform effect to a clip or adjustment layer, uncheck Use Composition’s Shutter Angle, and set a Shutter Angle of 180° for natural-looking motion blur.

- Preview and Render: Hit Enter to render your timeline and preview the transition. Make tweaks as needed to timing or placement.
Pro Tips & Workflow Improvements
- Use Adjustment Layers for Reusability: Add transitions to adjustment layers so they can be reused and tweaked independently of the clips.
- Download Presets: Many creators offer free or premium Premiere Pro transition presets that save time.
- Keyboard Shortcuts: Press Cmd+D (Mac) or Ctrl+D (Windows) to quickly apply the default transition.
- Create Custom Transitions: Combine Transform, Directional Blur, and keyframes for advanced looks.
- Nest Sequences: Nesting clips before applying complex transitions can avoid interference from clip edits.
Advanced Use Case: Create a Smooth Zoom Transition
- Place an Adjustment Layer above two clips.
- Apply the Transform effect to it.
- Keyframe Scale from 100% to 120% at the cut.
- Set Shutter Angle to 180° and disable Use Composition’s Shutter Angle for motion blur.
- Easy ease the keyframes using Temporal Interpolation to smooth the acceleration.
Troubleshooting & Common Mistakes
- Transition Not Applying? Check for gaps between clips or insufficient clip handles.
- Choppy Playback? Use Sequence > Render In to Out to improve preview performance.
- Effect Looks Harsh? Adjust duration or alignment to smooth out the look.
- Missing Effects? Make sure you’re in the All Effects view in the Effects panel.
- Keyframes Not Working? Ensure the Toggle Animation stopwatch is enabled in Effect Controls.
Conclusion
Smooth transitions can make your edits feel fluid and professional, turning basic cuts into cinematic flows. By mastering these steps and experimenting with effects, adjustment layers, and keyframes, you can craft transitions that match your creative style.


1 Comment
Convert Footage to LOG in Premiere - E-Tips Daily
June 17, 2025[…] 🎬 Also learn how to build buttery-smooth scene transitions in our Premiere Pro transitions guide. […]