Designing a logo in Adobe Illustrator is one of the best ways to create a professional, scalable, and versatile brand mark. Illustrator’s vector-based tools ensure your logo can be resized without losing quality, making it perfect for print, digital, and everything in between.
In this guide, you’ll learn how to design a custom logo from scratch using Illustrator’s most powerful tools. Whether you’re creating a wordmark, symbol, or combination logo, these steps will set you up for success.
Step-by-Step: How to Design a Logo in Illustrator
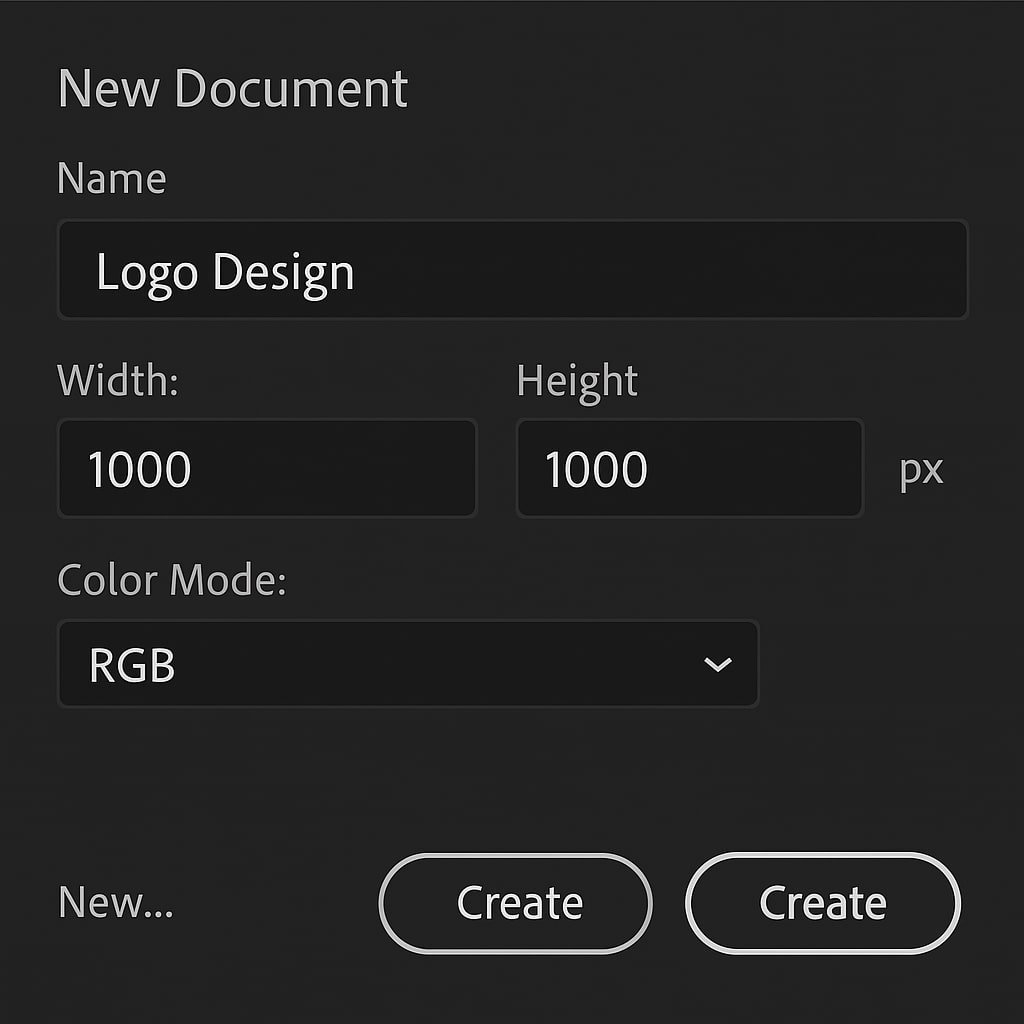
- Set Up Your Workspace
- Open Adobe Illustrator and create a new document (Ctrl+N or Cmd+N).
- Choose a canvas size like 1000px x 1000px with RGB color mode.
- Enable Smart Guides under View > Smart Guides for easier alignment.
- Brainstorm and Sketch Your Ideas
- Before going digital, sketch logo ideas on paper or a tablet.
- Consider your brand’s values, audience, and style.
- Choose the strongest concept to build in Illustrator.
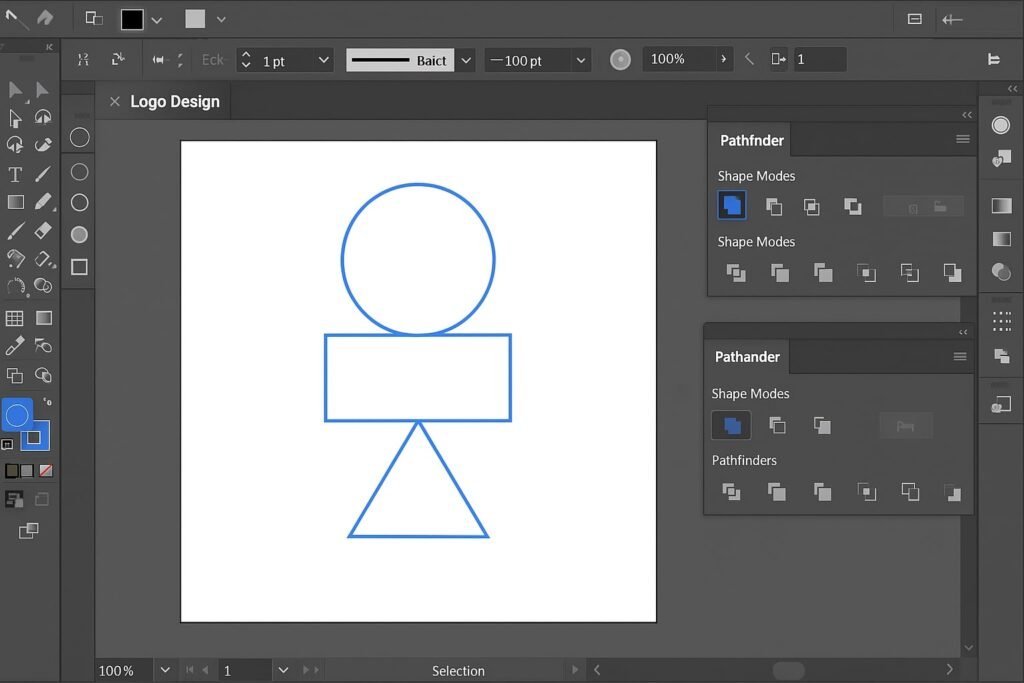
- Build Basic Shapes with the Shape Tools
- Use the Rectangle (M), Ellipse (L), and Polygon Tool to create geometric forms.
- Combine and modify shapes with the Pathfinder Panel (Window > Pathfinder).
- Use the Pen Tool for Custom Shapes
- Select the Pen Tool (P) to draw unique curves and outlines.
- Adjust anchor points with the Direct Selection Tool (A).
- Add and Customize Typography
- Choose the Type Tool (T) and select a suitable font.
- Outline your text via Type > Create Outlines to make it editable as shapes.
- Modify letters with the Direct Selection Tool or Pathfinder.
- Align and Balance Your Elements
- Use the Align Panel (Window > Align) to center and space your elements.
- Adjust size and position for visual harmony.
- Apply Colors and Gradients
- Use the Swatches Panel and Color Picker to select a color palette.
- Apply gradients via the Gradient Tool (G) for depth.
- Use the Grid and Snap Features for Precision
- Enable the grid: View > Show Grid.
- Snap to grid for perfect alignment: View > Snap to Grid.
- Add Final Touches
- Add effects like shadows or strokes subtly.
- Check your design in black and white for versatility.
- Save and Export Your Logo
- Save your source file as .AI.
- Export to .SVG, .PDF, and .PNG for various uses: File > Export > Export As.
Pro Tips & Workflow Improvements
- Use Artboards to test logo variations (color, size, format).
- Limit your color palette to 2–3 colors for better scalability.
- Try the Shape Builder Tool (Shift+M) for intuitive shape merging.
- Use Appearance Panel to apply multiple strokes or fills.
- Use Adobe Fonts for high-quality, license-safe typography.
Advanced Use Case: Creating a Responsive Logo System
Create multiple logo variations:
- Primary Logo: Full version with text and icon
- Secondary Logo: Icon only
- Favicon or Monogram: Simplified version for small sizes
Use Illustrator’s Asset Export Panel to export all versions at once.
Troubleshooting & Common Mistakes
- Jagged edges? Make sure you’re using vector shapes, not raster images.
- Font not loading? Convert to outlines or embed fonts before sharing.
- Misaligned elements? Use Smart Guides and Align Panel.
- Scaling issues? Export in vector formats like SVG or PDF.
- Too complex? Simplify shapes for clarity and recognizability.
Conclusion
Designing a logo in Illustrator gives you full control over creativity and precision. By mastering these steps, you’ll be able to create logos that are not only beautiful but also functional across all platforms.