Want to capture your Android screen for a tutorial, gameplay, or bug report—without installing anything extra? Good news: most modern Android devices now come with a built-in screen recorder. It’s fast, simple, and powerful enough for most needs.
In this guide, you’ll learn exactly how to use Android’s native screen recorder, what settings to adjust, how to locate your recordings, and pro tips to improve your workflow.
Step-by-Step Guide: Use Android’s Built-In Screen Recorder
✅ Note: The built-in screen recorder is available on Android 11 and up. Your phone brand (Samsung, Pixel, OnePlus, etc.) may slightly change the UI, but the core steps are the same.
1. Swipe down to open the Quick Settings menu
- Swipe down from the top of your screen once or twice to fully expand the Quick Settings panel.
- Look for the Screen Record or Screen Recorder tile.
2. Add the screen recorder tile (if not visible)
- Tap the pencil icon or Edit to customize your Quick Settings.
- Drag the Screen Record icon into the active tiles area.
- Exit edit mode to save.
3. Tap the Screen Record icon
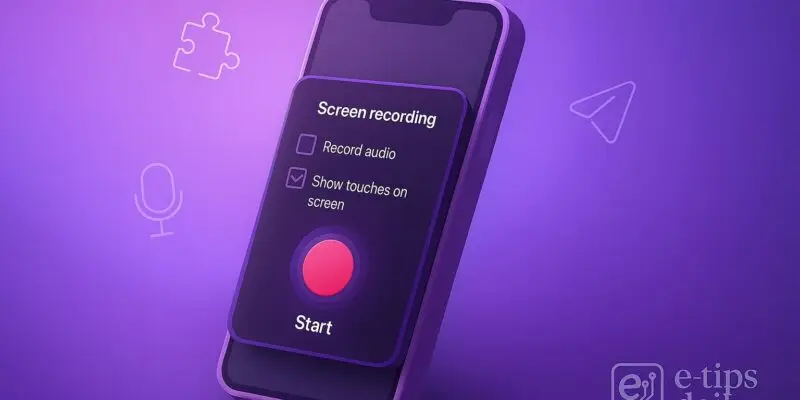
- You’ll see a popup asking what to record.
- Options include:
- Audio settings: Record device audio, microphone, or both.
- Show touches: Useful for tutorials.
4. Choose your recording options
- Select whether to record audio.
- Toggle Show touches on screen if needed.
- On some phones (e.g., Samsung), you can pick video quality and selfie cam overlay too.
5. Tap Start (or Start Recording)
- A countdown (usually 3 seconds) will begin.
- Once it ends, recording starts.
6. Perform the actions you want to record
- The recorder runs in the background.
- You’ll see a small floating toolbar or red dot indicating it’s active.
7. Stop the recording when finished
- Swipe down and tap Stop from the notification panel.
- Or tap the Stop button on the floating bar (if available).
8. Access your recorded video
- Go to the Gallery or Google Photos app.
- Look under the Screen Recordings or Movies folder.
- You can trim, share, or upload from there.
Pro Tips & Workflow Improvements
- Use Do Not Disturb: Turn it on to prevent calls or notifications from interrupting your video.
- Record at higher resolution: On Samsung and Pixel phones, check settings to increase quality to 1080p or higher.
- Use gestures: Enable screen gestures in your OS to navigate fluidly during recording.
- Add voice narration: Select Mic + device audio to explain your screen actions in real time.
- Use editing tools: Google Photos now lets you trim or stabilize your video right after recording.
Advanced Use Case: Recording with Picture-in-Picture (PiP)
On some Android models (like Samsung Galaxy or Xiaomi), you can enable front camera overlay:
- It shows your face in a bubble while screen recording.
- Perfect for tutorials, reaction videos, or gaming walkthroughs.
- Enable this via Screen Recorder settings in Settings > Advanced Features > Screenshots and screen recorder.
Troubleshooting & Common Mistakes
“Screen Record button not showing”
- Fix: Manually add it from the Quick Settings editor.
“Can’t record audio”
- Fix: Confirm microphone permissions are granted.
- Check Do Not Disturb settings aren’t muting audio input.
“Recording cuts off early”
- Fix: Make sure battery saver isn’t interfering.
- Some brands limit recording to 30 minutes.
“Video is laggy or low quality”
- Fix: Close background apps before recording.
- Adjust resolution settings in screen recorder options.
“Floating bar missing”
- Fix: Some models don’t support on-screen controls; rely on notification panel instead.
Conclusion
You now know how to screen record on Android without any third-party apps. Whether you’re making a tutorial, capturing gameplay, or reporting a bug, the built-in screen recorder offers a surprisingly capable solution. Just remember to tweak settings like resolution and audio source to get the best results.
Next up: Learn how to edit your screen recordings in Google Photos or create GIFs from videos for quick sharing.