If your Outlook inbox feels chaotic, email rules can help restore order. These rules automatically sort, flag, or forward messages based on criteria you define. Whether you’re drowning in newsletters or need to highlight client emails, setting up rules in Outlook is one of the most effective ways to manage your inbox.
In this guide, you’ll learn exactly how to create, customize, and troubleshoot Outlook rules on both desktop and web. You’ll also pick up pro tips for streamlining workflows and handling more advanced use cases.
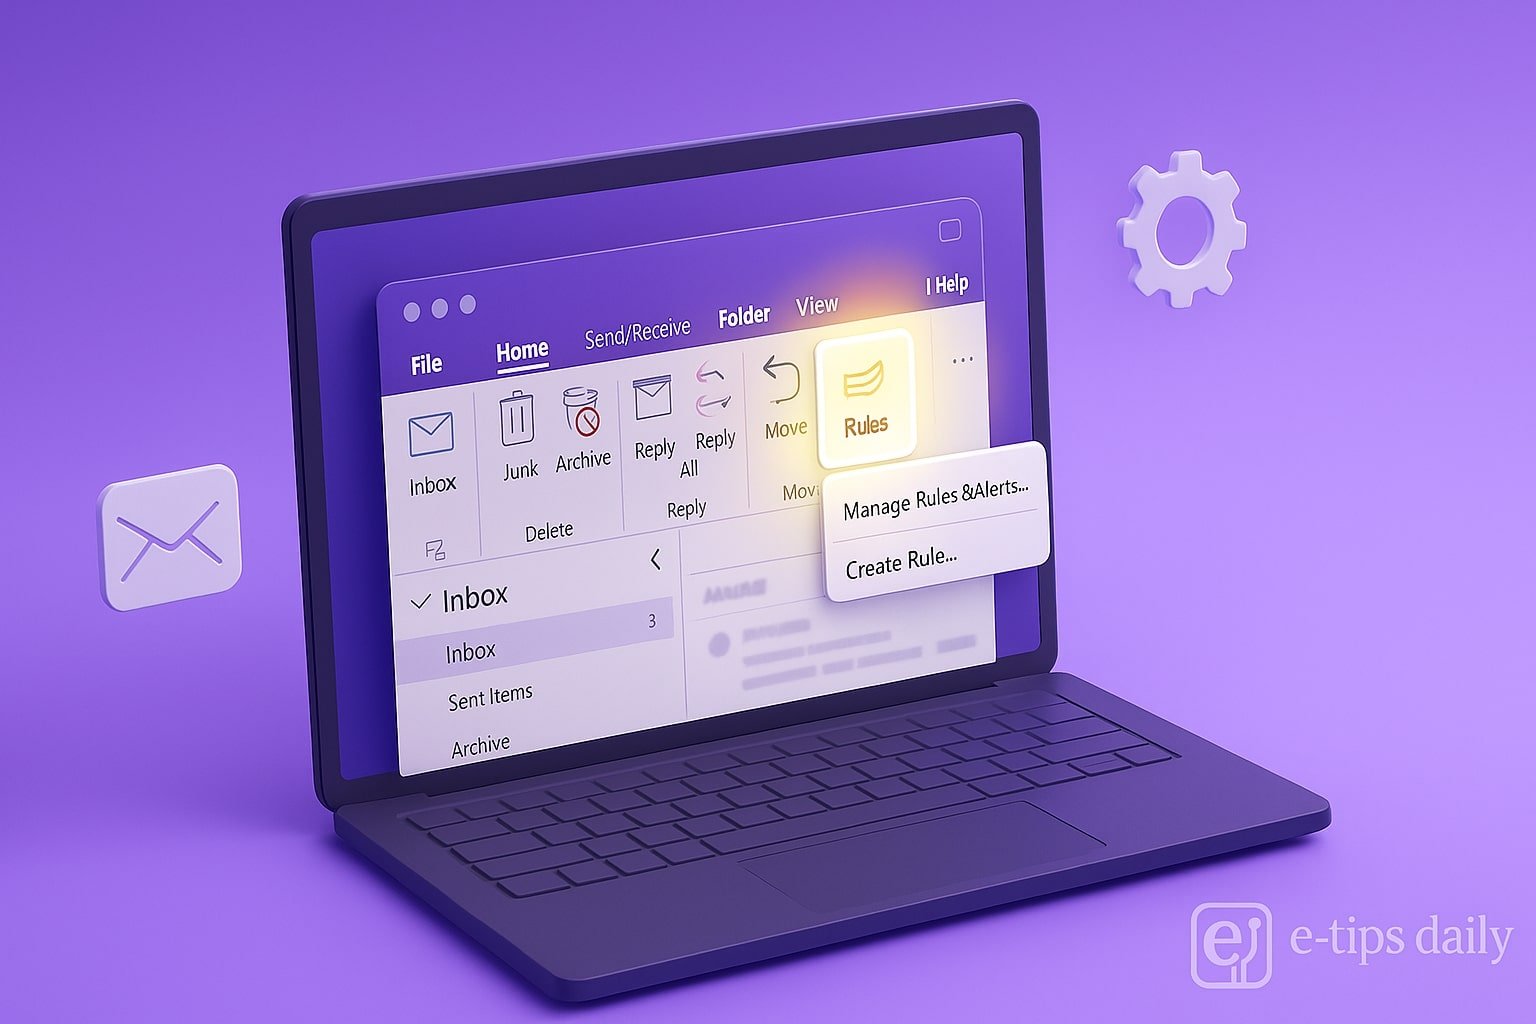
Step-by-Step Guide: Create Rules in Outlook Desktop
- Open Outlook and go to the Home tab
You’ll find the Rules option in the Move group. - Click on “Rules” and select “Manage Rules & Alerts”
This opens the Rules and Alerts dialog box. - Click “New Rule”
You’ll start the Rules Wizard to build a new rule from scratch or from a template. - Choose a template or start from a blank rule
For full control, choose “Apply rule on messages I receive” under Start from a blank rule. - Set conditions for your rule
Examples: emails from a specific address, with certain words in the subject, etc. - Specify what happens when the condition is met
Actions include moving to a folder, marking as read, forwarding, or deleting. - Add exceptions if needed
For example, exclude emails marked as important. - Name your rule and choose if it applies to existing messages
You can run it on messages already in your inbox. - Click Finish, then Apply
Your rule is now active!
Step-by-Step Guide: Create Rules in Outlook Web (Outlook.com or Outlook for Microsoft 365)
- Go to Outlook.com and sign in
- Click the gear icon (Settings) and choose “View all Outlook settings”
- Navigate to Mail > Rules
- Click “Add new rule”
- Name your rule and define conditions
- Set the action(s) to perform when conditions are met
- Add exceptions if desired
- Click Save
Your rule will automatically start organizing your incoming emails.
Pro Tips & Workflow Improvements
- Use color categories in your rule actions to visually organize your inbox
- Create rules for high-volume senders like newsletters or automated systems
- Combine rules with Quick Steps in Outlook desktop for even faster handling
- Export your rules from the Rules and Alerts window to back them up
- Use server-side rules (available for Exchange accounts) to apply rules even when Outlook isn’t running
Advanced Use Case: Automatically Forward Specific Emails with a Delay
For business workflows, you might want to forward emails only after they meet a series of criteria (e.g., unread for 2 days). While Outlook doesn’t support delayed rules natively, you can use Outlook VBA scripting or Power Automate (Microsoft Flow) to build this logic.
Example via Power Automate:
- Trigger: New email received
- Condition: From specific sender AND unread for 2 days
- Action: Forward email to team lead
Troubleshooting & Common Mistakes
- Rule not working? Make sure it’s enabled and not conflicting with other rules.
- Too many rules? Outlook has a limit (~256KB total); streamline overlapping rules.
- Rules only work when Outlook is open? You’re using client-side rules. Switch to server-side if using Exchange.
- Emails not being filtered as expected? Check for missing or incorrect conditions.
- Rule deleted or missing? It may not sync across devices if not set up on the server.
Conclusion
Email rules in Outlook are essential for taming inbox chaos. Once you set them up, they work silently in the background, giving you more focus and less clutter. Try creating a few basic rules today and explore advanced features like Power Automate as your needs grow.
Next up: Learn how to create Quick Steps in Outlook to take email efficiency to the next level!